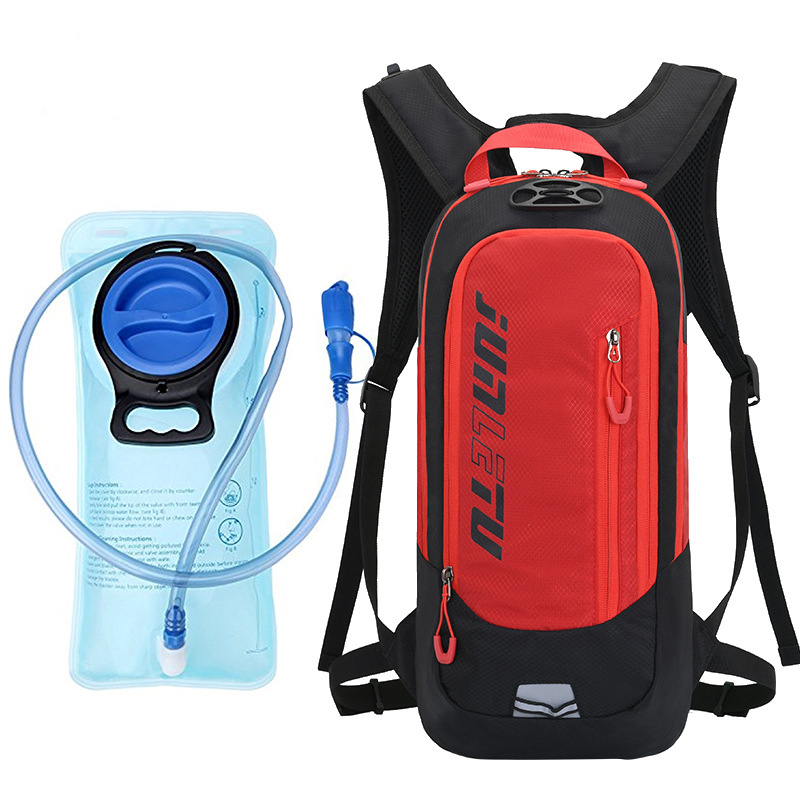
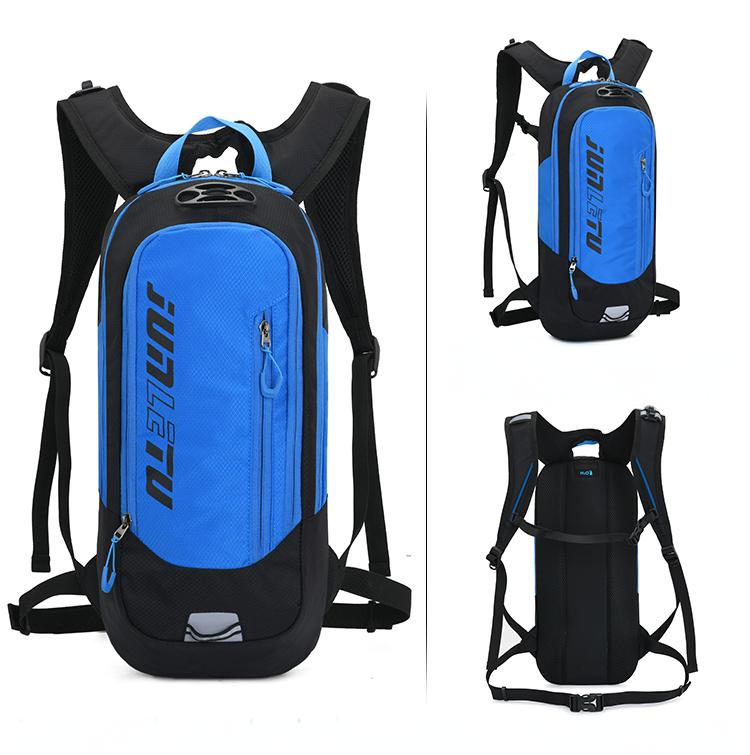
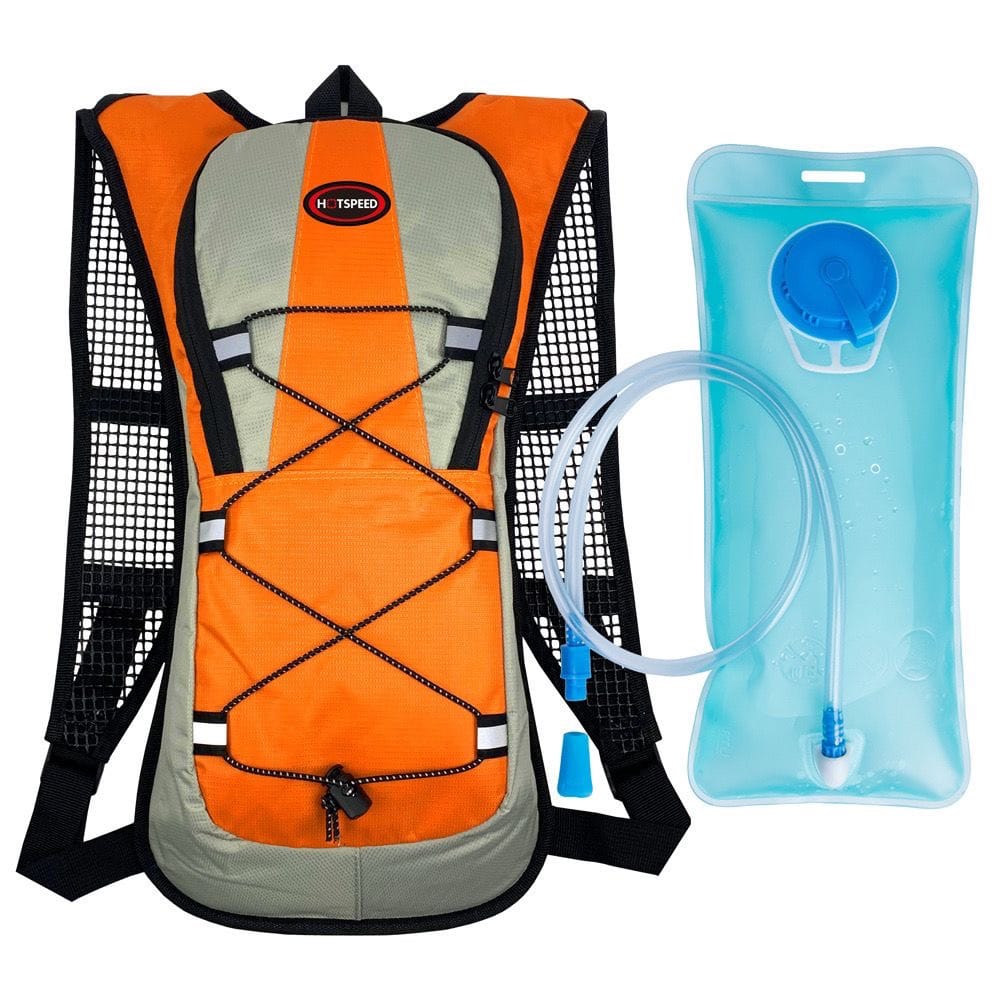
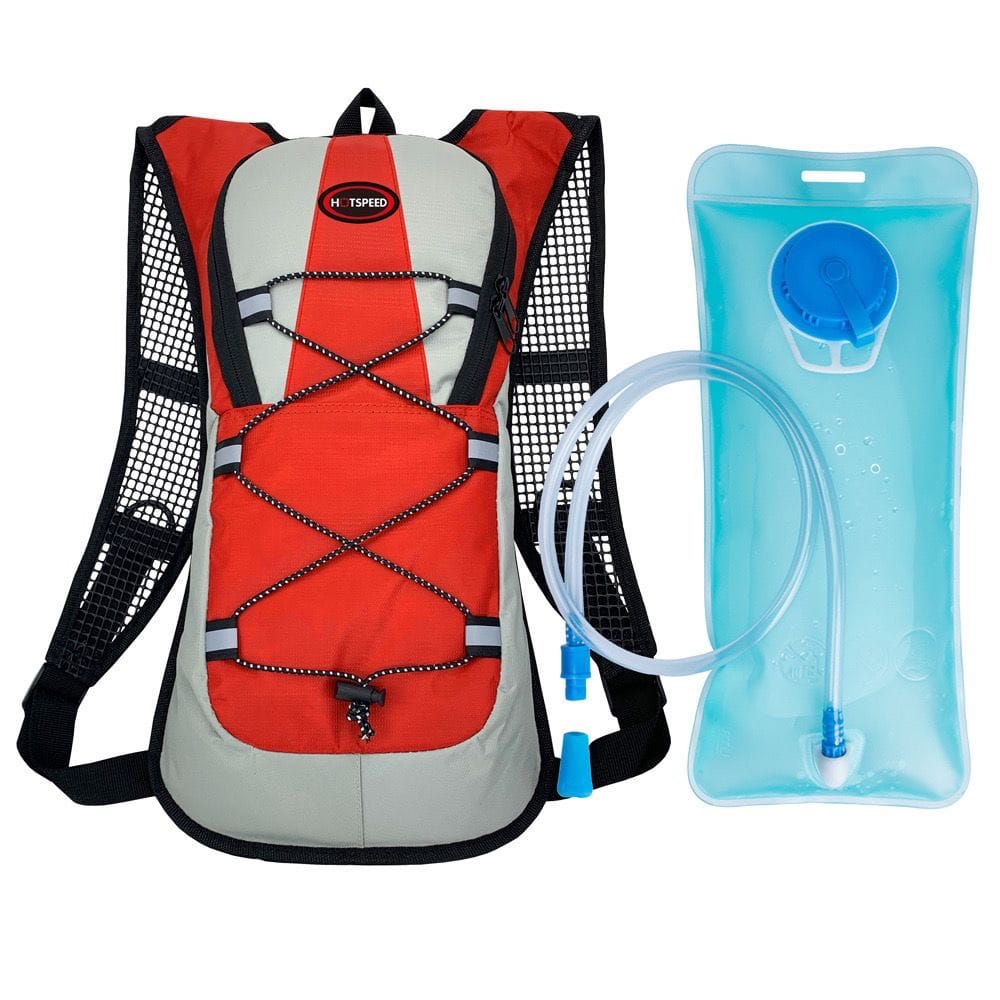
As an avid outdoor enthusiast who’s dabbled in everything from hiking to cycling and the occasional rock climbing adventure, I’ve tried my fair share of gear. Among them, hydration backpacks have become one of my go-to pieces of equipment over the past few years. When I first came across them, I was skeptical: Are these things really that practical? Are they just a gimmick? Would lugging around a water-filled pack be heavy and cumbersome? With those questions in mind, I bought my first hydration backpack, and after years of use, I can confidently say: It’s completely transformed how I stay hydrated during outdoor activities!
But is a hydration backpack right for you? What are its pros and cons? How do you choose and maintain one? Today, I’ll share my insights as an everyday consumer, drawing from personal experiences and some research, to help you decide whether it’s worth adding to your gear collection.

What Is a Hydration Backpack? Why Is It So Popular?
In simple terms, a hydration backpack is a specialized pack designed for outdoor activities, featuring a soft water bladder (typically 1-3 liters) and a drinking tube that lets you sip water on the go without stopping to grab a bottle. Its biggest selling points are convenience, lightweight design, and hands-free hydration, making it ideal for extended activities like hiking, running, cycling, or skiing.
The rise of hydration backpacks ties closely to the growing popularity of outdoor sports. According to Statista, the global outdoor recreation market surpassed $800 billion in 2023, with more people hitting the trails for hiking, trail running, and other activities. Hydration backpacks meet the need for efficient hydration in these scenarios, especially when you’re drenched in sweat and your hands are busy gripping trekking poles. There’s something incredibly satisfying about biting the mouthpiece and sipping water without breaking your stride!
My Real-World Experience: Pros and Cons of Hydration Backpacks
To give you a clear picture, I’ll start with my honest take on using a hydration backpack, covering both what I love about it and the frustrations I’ve encountered.
Pros: Why I’m Hooked
Instant Hydration, Maximum Efficiency
During a long-distance hike, my hydration backpack let me sip water while walking, no need to pause and dig out a bottle. This saved time and kept my pace steady. The drinking tube makes hydration second nature, which is a game-changer in hot weather or intense activities when staying hydrated is critical to avoiding dehydration.
Hands-Free, Focus on the Activity
When cycling or climbing, my hands are occupied with handlebars or holds, leaving no chance to grab a bottle. The hydration backpack’s tube clips to the shoulder strap, letting me sip with a quick bite, keeping my hands free.
Flexible Capacity for Any Scenario
My backpack has a 2-liter bladder, perfect for a full day of hiking or a half-day bike ride. For shorter trips, I fill it partially to reduce weight. The pack also has extra pockets for small essentials like my phone, energy bars, or a light jacket.
Comfortable Fit, Barely Noticeable
Well-designed hydration backpacks hug the body with ergonomic straps and breathable mesh, staying secure without bouncing. I hardly feel it while running, and the ventilated back panel cuts down on that sweaty, sticky feeling.

Cons: It’s Not Perfect
Cleaning Is a Chore
Cleaning the bladder and tube is a hassle, especially if you don’t rinse them right after use. Bacteria or mold can build up fast. I once skipped cleaning for a few days, and my bladder developed mold spots—took me an hour to scrub it clean!
Leak Risks
Poor-quality bladders or loosely sealed caps can leak, soaking the contents of your pack. I learned this the hard way when a loose cap drenched my phone—thankfully, a waterproof pouch saved it.
Initial Odor
New hydration backpacks sometimes have a plasticky smell that taints the water. I soak mine with lemon water or a baking soda solution for a few days to eliminate the taste.
Not for Everyone
Hydration backpacks shine for mid-to-long outdoor activities. For short walks or urban commutes, a regular water bottle is often more practical, and hauling a hydration pack might feel like overkill.
Best Scenarios for Hydration Backpacks
From years of use, I’ve found hydration backpacks excel in specific situations but aren’t always necessary. Here’s my breakdown:
Hiking/Trekking: Long hikes demand frequent hydration. A hydration backpack keeps you sipping without slowing down, freeing your hands for trekking poles.
Trail Running: The snug fit minimizes bouncing, and the tube is far easier than fumbling with a bottle mid-run.
Cycling: Whether road biking or mountain biking, sipping through a tube is safer and quicker than reaching for a bottle.
Skiing/Climbing: When your hands are tied up, a hydration backpack is a lifesaver.
Less Ideal Scenarios: Short outings, daily commutes, or indoor workouts are better suited for a simple bottle or small pack.

How to Choose a Good Hydration Backpack?
I’ve made a few purchasing mistakes along the way, but they’ve taught me what to look for. Here are key factors to consider when picking a hydration backpack that fits your needs and budget:
Bladder Capacity
1 Liter: Great for short activities (1-2 hours), like city runs or quick rides.
2 Liters: The most versatile, ideal for half-day hikes or longer cycling sessions.
3 Liters: Best for all-day treks, mountaineering, or multi-day camping, though heavier.
My go-to is 2 liters—perfect for most people’s needs.
Backpack Design
Fit: Look for adjustable shoulder and chest straps to keep the pack snug and stable.
Breathability: Mesh panels on the back and straps reduce sweat buildup.
Storage: Ensure there are pockets for essentials like phones, keys, or snacks.
Bladder and Tube Quality
Material: Choose food-grade TPU or PEVA for durability and safety.
Sealing: The bladder cap should be leak-proof, and the tube should have a bite valve to prevent drips.
Ease of Cleaning: Opt for wide-mouth bladders for easier scrubbing.
Weight and Size
Empty packs weighing 300-600 grams are lightweight enough for running or cycling. For mountaineering, you might need a larger, sturdier pack, but expect added weight.
User Reviews
Check feedback on leak issues, comfort, and durability. Real user comments on forums or e-commerce platforms can steer you away from subpar products.

How to Maintain a Hydration Backpack? My Tried-and-True Methods
A hydration backpack is only as good as how well you care for it. Neglect maintenance, and it could become a breeding ground for bacteria or wear out prematurely. Here’s what I do:
1. Clean After Every Use
Bladder Cleaning: Empty the water immediately after use, then wash the inside with warm water (not hot—it can damage the material) and a drop of mild dish soap. Use a dedicated bladder brush, and shake vigorously for hard-to-reach spots.
Tube Cleaning: Tubes trap grime easily. I use a thin tube brush or flush with running water repeatedly.
Drying: Air-dry the bladder and tube completely to prevent mold. I hang the bladder upside down, propping the opening with chopsticks to speed up drying.
2. Periodic Deep Cleaning
For long-term use, deep clean every 1-2 months:
Soak the bladder and tube in a baking soda solution (1 tsp per liter of water) for 10 minutes to eliminate odors and bacteria.
Alternatively, use diluted white vinegar (1:4 ratio) for similar results.
Rinse thoroughly to ensure no lingering taste.
3. Storage Tips
Dry Storage: Only store when the bladder and tube are fully dry to avoid mold.
Avoid Compression: Don’t fold the bladder too tightly, as prolonged pressure can cause cracks or deformation.
Cool Environment: Keep in a cool, ventilated spot, away from direct sunlight or heat.

4. Inspection and Repairs
Regular Checks: Before each use, inspect the bladder and tube for cracks or leaks, especially around the cap and connections.
Fixing Leaks: Small tears can be patched with TPU repair adhesive or waterproof tape, but large damage calls for a new bladder.
Replace Parts: Tubes or bite valves wear out over time—replace them to maintain performance.
Hydration Backpack Pros, Cons, and Tips at a Glance
For clarity, here’s a table summarizing the key aspects and care tips:
|
Aspect |
Details |
Usage/Maintenance Tips |
|---|---|---|
|
Hydration Efficiency |
Tube design for instant sipping, hands-free |
Ensure valve is sealed to prevent leaks; check water levels before heading out |
|
Comfort |
Snug fit, breathable mesh reduces sweat |
Choose adjustable straps, tighten for running or cycling |
|
Cleaning Difficulty |
Bladder and tube trap grime, time-consuming to clean |
Rinse immediately after use, use brushes, deep clean with baking soda periodically |
|
Durability |
Quality TPU/PEVA lasts, cheap materials leak |
Pick food-grade materials, inspect regularly, patch small damages promptly |
|
Best Scenarios |
Ideal for hiking, cycling, running; less practical for short trips |
Match capacity (1-3L) to activity duration, use bottles for short outings |
|
Storage & Care |
Humidity causes mold, compression risks damage |
Dry fully, hang to store, avoid tight folding, keep in cool, ventilated spot |
My Real-Life Story: How a Hydration Backpack Saved the Day
Let me share a quick story. Last year, I joined a 25-kilometer mountain hike on a scorching day, sweat pouring off me. I packed my 2-liter hydration backpack, filled to the brim, with some snacks and sunscreen tucked in the pockets. One of my teammates, who only brought a 500ml bottle, ran out of water halfway and was struggling. My hydration backpack not only kept me hydrated the whole way but also let me share some water with them, saving the day. It felt like a superhero moment! Since then, it’s been a non-negotiable part of my long outdoor adventures.
That said, I’ve had my share of mishaps. Once, during a bike ride, I forgot to secure the bladder cap, and water leaked all over my pack, soaking my map and snacks. That taught me to double-check the seal every time.

Frequently Asked Questions
To address common concerns, here are some FAQs with answers:
Q1: Are hydration backpacks for everyone?
A: Not necessarily. They’re best for mid-to-long outdoor activities like hiking, cycling, or running. For short walks or indoor workouts, a water bottle is often enough.
Q2: Is the water in hydration backpacks safe to drink?
A: Yes, if you use food-grade TPU or PEVA bladders and clean them regularly. New bladders may have a slight plastic taste—soak with baking soda or lemon water to remove it.
Q3: What if my hydration backpack leaks?
A: Check if the cap is tight and the tube connections are secure. Patch small tears with TPU adhesive; replace the bladder for major damage.
Q4: Can I put drinks other than water in the bladder?
A: You can use water, sports drinks, or electrolyte solutions, but avoid carbonated drinks or juices, which foster bacteria and are hard to clean. Rinse thoroughly after non-water drinks.
Q5: How do I clean a hydration backpack quickly?
A: Wash with warm water and mild soap, use dedicated brushes for the bladder and tube, then hang to dry. Deep clean periodically with baking soda to remove odors.
Wrapping Up
After years of using hydration backpacks, my takeaway is this: They’re not a must-have, but once you get used to them, they’re hard to live without. Their convenience and efficient hydration make them a perfect match for outdoor activities, especially long hikes or high-intensity sessions where staying focused matters. Sure, they come with quirks like tricky cleaning or leak risks, but with the right product and care routine, those are manageable.
If you’re into outdoor adventures or planning a big hike or ride, give a hydration backpack a shot. It might not win you over instantly, but after a few uses, you’ll likely find it’s your trusty sidekick for staying hydrated on the move. Got tips or questions about hydration backpacks? Drop them in the comments—let’s geek out over outdoor gear together!